
Quick Verdict: The TL;DR
If you want to track actual revenue, see product images in your emails, and automate based on purchase history, use the Native ActiveCampaign App, not Zapier. It creates a “Deep Data” connection that third-party tools cannot replicate easily. However, be warned: Not every customer synced is a subscriber. If they didn’t check the marketing box at checkout, you cannot legally spam them.
Most guides complicate this. They tell you to build complex “zaps” or hire a developer.
That is unnecessary.
I have set up this integration for dozens of e-commerce clients, from drop-shippers to 7-figure D2C brands. The goal is always the same: Turn Shopify data into ActiveCampaign money.
We are going to treat Shopify as your “Source of Truth” for data (Orders, Revenue, Address) and ActiveCampaign as your execution engine.
In this guide, I will walk you through the native Deep Data integration, explain exactly why your subscriber count might look wrong (the “Gotcha”), and help you launch your first revenue-generating automation.
Who Is This Guide Really For?
Before we start, let’s be clear on who benefits from this specific setup.
Best For:
- D2C Store Owners: Who need to send abandoned cart emails that actually show the product image.
- Marketing Managers: Who need to segment lists based on “Lifetime Value” or “Total Revenue.”
- Scale-ups: Stores processing 50+ orders a month who need to move away from generic Shopify emails.
Who Should Avoid This? (Negative Proof)
- B2B Wholesalers utilizing custom invoicing: If your “sales” happen offline or via draft orders that don’t pass through the standard checkout, the Deep Data sync might miss revenue figures.
- Users on ActiveCampaign “Marketing Lite”: You generally need the Plus/Professional bundles (or the specific E-commerce add-on) to access Deep Data features. If you are on the cheapest absolute tier, this integration won’t show you the revenue dashboards.
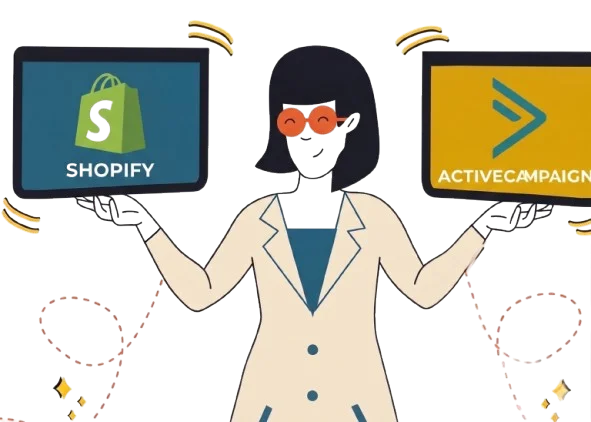
The “Native” vs. “Third-Party” Stance
I often get asked: “Should I just use Zapier to send my customers to ActiveCampaign?”
My answer is a hard no. At least, not for the foundation.
We are sticking strictly to the Native ActiveCampaign Deep Data Integration.
Why We Reject Zapier for Core Syncing
Middleware like Zapier or Make is fantastic for edge cases. But for the core pipe—moving customer name, email, and order history—it is a bad idea.
- Cost: syncing 5,000 orders via Zapier burns 5,000 tasks. That gets expensive fast.
- No “Deep Data”: Zapier pushes text. It tells ActiveCampaign “John bought a Shirt.” The Native App pushes objects. It tells ActiveCampaign exactly which shirt, the image URL, the price, and the total order value, allowing you to use the drag-and-drop product block in the email builder.
- Speed: The native integration is built to handle bulk historical imports. Zapier will time out if you try to push 2 years of history at once.
Key Takeaway: Treat Zapier as a “Phase 2” solution for weird custom fields. Your Phase 1 is the Native App.
Step-by-Step: Setting Up the Deep Data Integration
This process is straightforward, but don’t rush the settings. A wrong click here can mess up your tagging logic later.
Step 1: Install the ActiveCampaign App in Shopify
Go to the Shopify App Store and search for “ActiveCampaign.” Look for the official app developed by ActiveCampaign.
- Click Install.
- It will redirect you to your ActiveCampaign login.
Step 2: The Handshake
Once logged in, the app will ask to connect your store.
- Select your ActiveCampaign account.
- Authorize the connection.
- Crucial Step: You will see a list of “Deep Data” checkboxes. Ensure “Sync Historical Data” is checked.
Step 3: Mapping the Fields
Shopify will ask where you want the data to go.
- Email -> Email (Locked)
- First Name -> First Name
- Phone -> Phone
My advice: Do not over-map here. If you create too many custom fields for things like “Notes,” your contact records become messy. Stick to the basics. Let the “Deep Data” handle the order history automatically—you don’t need to map “Order Date” manually; the system handles it in the background.
The Big “Gotcha”: Subscribers vs. Customers
This is the part that trips up 90% of the clients I work with.
The Scenario:
You finish the sync. You look at Shopify and see 1,000 customers. You look at ActiveCampaign and see 1,000 contacts.
You think: “Great, I can email 1,000 people.”
You create a campaign, hit send, and it only goes to 200 people. You panic. You think the software is broken.
The Reality:
It is not broken. It is the law.
Shopify creates a contact record for everyone who buys. However, ActiveCampaign distinguishes between a Contact and a Subscriber.
- Contact: Someone whose data you have (for transactional emails, shipping updates).
- Subscriber: Someone who explicitly checked the “Keep me updated with news and offers” box at checkout.
The native integration respects this status. It will sync everyone, but it will marks those who didn’t opt-in as “unsubscribed” from your marketing list.
Key Takeaway: Do not force-subscribe these people. If you manually override their status and email them, you risk high spam complaints and getting your domain blacklisted. Market only to the “Accepts Marketing” group.
Your First Automation: The “Deep Data” Abandoned Cart
Now that the data is flowing, we need to make money.
The mistake most people make is setting up a “Welcome Series” first. A welcome series is nice, but it doesn’t print money immediately.
The Abandoned Cart does.
Because we used the Native Deep Data integration, we can build a cart recovery email that looks professional without any coding.
How to Build It:
- Go to Automations -> Create New.
- Trigger: “Abandons Cart” (This trigger only appears if the Shopify integration is active).
- Set the wait timer: 1 Hour. (Don’t do 4 hours; conversion drops).
- Action: Send Email.
Inside the Email Editor:
This is where the magic happens.
- Open the email designer.
- Look for the “Abandoned Cart” block on the sidebar.
- Drag it into the email body.
This block automatically pulls the image, title, and price of the exact product the user left behind. You don’t need to write code. It just works.
Why this matters: A generic “You left something behind” email gets a 10% click rate. An email showing the exact red shoes they looked at gets a 25%+ click rate.
Sync Direction: Who is the Boss?
To keep your data clean, you need to establish a hierarchy.
Rule: Shopify is the Source of Truth. ActiveCampaign is the Reporter.
We generally recommend a One-Way Sync for core data:
- Shopify -> ActiveCampaign: Updates Name, Email, Address, Orders, Total Spent.
If you change a customer’s address in ActiveCampaign, it generally does not push back to Shopify to update the shipping label (and you wouldn’t want it to—that is dangerous).
The Exception: Two-Way Tagging
The only time we want data flowing back to Shopify is for Tags.
Example:
If a customer spends over $500, ActiveCampaign can detect this via an automation. You can then add a specific tag: VIP-Customer.
You can configure the integration to push this VIP-Customer tag back to Shopify.
Why do this?
Because then you can use a Shopify plugin to automatically give anyone with the VIP-Customer tag a 10% discount at checkout or access to a hidden collection. This is where the two systems work together nicely.
What You Actually Get at Each Price Point
ActiveCampaign’s pricing is complex. Here is what you need for this integration to actually work effectively.
|
Feature |
Lite Plan |
Plus Plan |
Professional/Enterprise |
|---|---|---|---|
|
Shopify Sync |
Limited |
Yes |
Yes |
|
Deep Data |
No |
Yes |
Yes |
|
Abandoned Cart |
No |
Yes |
Yes |
|
Revenue Reports |
No |
Yes |
Yes |
|
Predictive Sending |
No |
No |
Yes |
The Smartest Way to Get Started:
Do not start on the “Lite” plan if you are serious about E-commerce. You will sync the contacts, but you won’t get the Deep Data (Revenue/Product Images). You need the Plus plan (or the “Marketing” bundle) to unlock the e-commerce dashboards.
Warning: If you are on a tight budget, double-check your contact count. ActiveCampaign charges by list size. Clean your list before you import your Shopify history. Don’t pay to host 5,000 customers who haven’t bought since 2018.
5 Steps to Launch Sync Shopify Customer Data to ActiveCampaign
Don’t just read this. Here is your checklist for the next 24 hours.
- List Hygiene: Export your Shopify customers to CSV. Identify customers who haven’t bought in 2 years. Decide if you really want to sync them.
- Install the App: Follow the steps above. Connect the store.
- Wait for the Historical Sync: This is not instant. If you have 10,000 orders, it might take a few hours. Go get a coffee.
- Verify the Data: Open a contact in ActiveCampaign. Click on the “E-commerce” tab. Do you see “Total Revenue” and past orders? If yes, you are live.
- Activate the Cart Recovery: Turn on the Abandoned Cart automation we discussed.
What To Do Next
You have the strategy. Now you need the software.
If you haven’t signed up yet, go get the ActiveCampaign free trial. Connect it to Shopify immediately—you don’t need to pay to test the integration. See if your data pulls through correctly. If you see your revenue numbers light up on the dashboard, you’ll know it’s the right move.
FAQ
1. Can I sync multiple Shopify stores to one ActiveCampaign account?
Yes. You can connect multiple stores. Deep Data allows you to segment by “Store Name,” so you can keep the audiences separate or combine them.
2. Does the sync happen in real-time?
It is near real-time. Usually, data appears within 1 to 5 minutes of the order being placed.
3. What happens if I delete a contact in ActiveCampaign?
It does not delete them in Shopify. Remember, Shopify is the Source of Truth. If they buy again, they will be re-added to ActiveCampaign (though they might be marked as unsubscribed depending on their checkout choice).
4. Can I sync “Draft Orders”?
Generally, no. The native integration triggers on completed orders. Draft orders usually require a third-party tool like Zapier to catch effectively.